ESP8266 based Tank level sensor
I needed a way of measuring the volume of remaining fuel inside a 1200 Ltr fuel tank. The tank is outside, far away from my main home automation controller computer. I wanted an excuse to use the ESP8266, and this simple project seemed like a suitable one.
The software options
1. Arduino Bootloader + ESP8266 board file with inotool (+ scheduler)
Given my previous software choice, which was a co-operative tte-systems scheduler that I ported from ARM, porting the system to the ESP8266 (RISC) seemed like the natural choice for me. I use vim religiously, so avoiding the Arduino GUI with inotool makes sense here.
The downside would be an extended development time for no real gain. I’m looking for a quick solution here, and to learn something new.
2. Stock Expressif SDK with or without FreeRTOS
The stock SDK is available with FreeRTOS or with a callback/ based system. There is also a more open fork.
3. NodeMCU Lua interpreter
NodeMCU12 is built upon the ESP8266 SDK 1.4. It happens to contain modules for almost everything I need for this project – including MQTT support.
4. Arduino + ESP8266 + pubsubclient
This is the old-world solution which uses an Arduino MCU + a stock ESP8266 module controlled with AT commands. It was the de-facto solution before the ESP8266 became hackable. Espduino adds MQTT and HTTP libraries to the Arduino. I dismissed this idea as the extra MCU seems redundant.
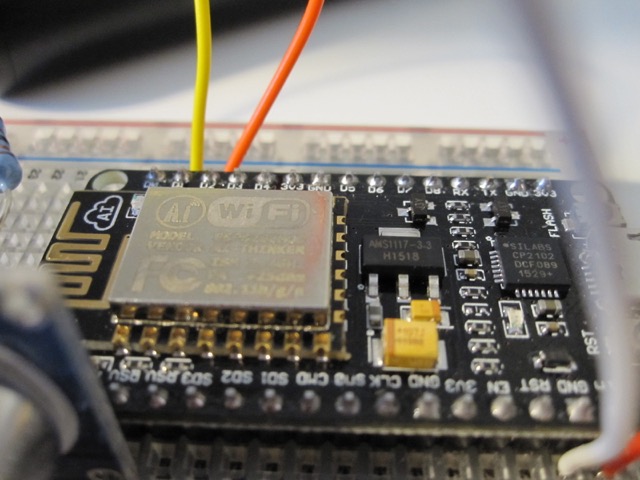
The hardware
The choice of hardware was easy. There is a plethora of suitable modules out there at the moment. It all started with the IO-constrained (but tiny) ESP-01 pictured here:

I got one of those, together with a HUZZAH module and an official (?) NodeMCU board from ebay. The NodeMCU board came first, so I used it.
Hello world
I decided to give NodeMCU a go first. Setup was easy – I followed the Docker based example to be able to select the modules I needed ( using user_modules.h) to cut down on the resulting binary size – which was already dangerously close to the 512K limit of the SPI flash memory of the modules.
When the binary file is created, esptool can be used to load the code. After this, connecting to the UART with picocom reveals a Lua REPL to execute commands. The NodeMCU README demonstrates how to connect to a wifi network using this REPL. Curiously, the (ephemeral) use of the REPL is assumed in all of the examples. Considering everything is lost on a power cycle and the manual typing, this isn’t a practical solution.
I noticed that the REPL complains that it cannot find init.lua. Running binwalk and file commands on the contents of the build output directory for NodeMCU revealed a FAT filesystem – I then looked for ways of getting the init.lua on that filesystem in the hope that the Lua code would be executed on boot. I bet it’s possible to create a filesystem image to be included in the binary image, but I didn’t want to go down that path because it would probably result in a large turnaround time to update the code. I couldn’t find anything suggesting how to load init.lua on the NodeMCU README/website, but then again I didn’t look that hard.
Eventually I stumbled across luatool which worked by writing a Lua script to the UART which opens a file handle and writes a line at a time. I found it to work, albeit slowly and unreliably. After this I found nodemcu-uploader which appears to load an agent (in a similar fashion) and then proceed to upload the raw file after increasing the speed of the UART to 115200 Baud which was significantly faster and more reliable.
Now that I had a way of running a script on boot, I tried a quick example WiFi/MQTT script only to be met by a few race conditions: it is necessary to be associated, with an IP address before MQTT can connect; it is necessary to be connected with MQTT before a message can be sent. This is not an issue with the example code when typing by hand, as this gives the system time to connect before a message is sent. Using the callbacks fixed the problems.
Before long I had a working prototype, using node_hcsr04:
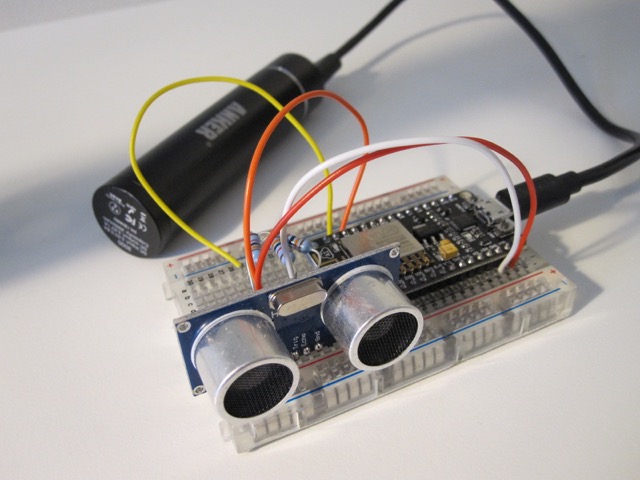
The distance reading, converted to integer centimetres was marshalled via MQTT directly to my home automation panels; another project in the blog queue.
The finished product… soon.
I got a new 2" fuel cap for the kerosene tank and used a cable gland to install a waterproof ultrasonic sensor, but not without accidentally cracking the plastic because I should have used a pillar drill instead of my rather crappy hand drill with a blunt drill bit… So, when the new cap comes I’ll post again after I’ve made a nice proto-PCB.
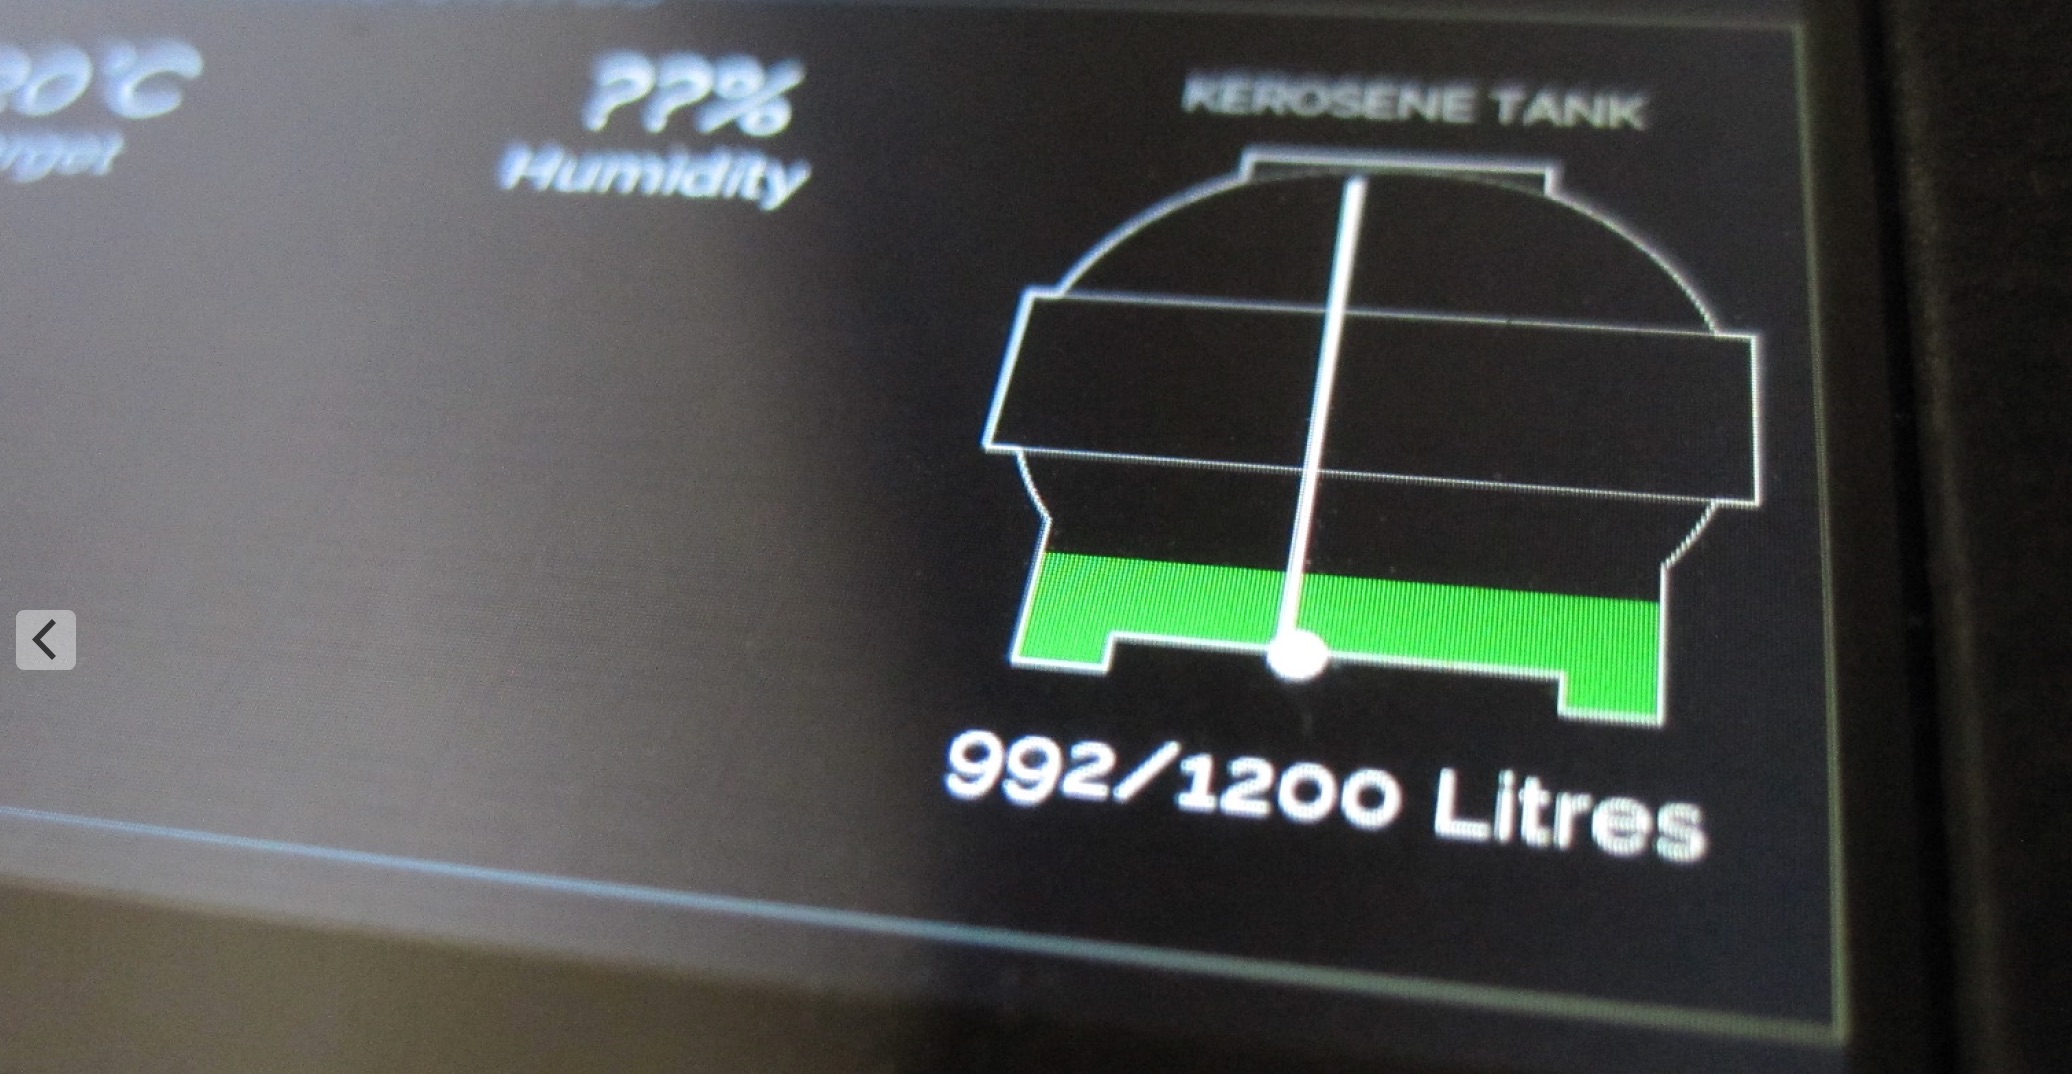
Volume estimation
Unfortunately the tank isn’t a cuboid; rather, it’s mostly a cylinder which means the distance from the oil level to the top of the tank (which is what the device is measuring) is not linearly proportional to the volume of remaining oil. This isn’t a problem if you need a rough indication, or just use an icon as above. The tank could be approximated as a cuboid, but this would result in an unacceptable measurement error.
The icon shown above is simply an SVG mask with a (hard green) CSS3 gradient behind it.
I think I will produce a lookup-table with the SVG based icon above used to simulate the behaviour of the tank – by virtually filling up the tank and counting the green pixels programmatically.
Thanks for reading!
Thanks for reading! If you have comments or like this article, please post or upvote it on Hacker news, Twitter, Hackaday, Lobste.rs, Reddit and/or LinkedIn.
Please email me with any corrections or feedback.